Key Lime Pie

Key LIme pie long

Something about summer makes me crave Key Lime Pie.  It’s probably because my mom made a Key Lime Pie for a 4th of July picnick one year and someone suggested we use whipped egg whites in the recipe to turn it into a cheese-cake-like pie.  We’ve never looked back.  Or perhaps because it works so well as a cool, summer dessert and gives you a hint of ice cold lemonade with its citrus bite.  In any case, it’s my go-to contribution for summer parties.

S. and I threw this together to take along as our medical school class kicks off the next year of school with a barbacue and catches up on our first few weeks of seeing real hosptial patients.  It’ll be nice to see everyone, because, lets me honest, after spending two years in the same classroom with these folks day in and day out, it’s weird to never see them anymore.

Key Lime Pie:

key lime pie square

1 graham cracker crust
4 egg yolks
3 egg whites
5 oz Key Lime Juice (found near the drink mixers in the grocery store)
1 can sweetened condensed milk

1. Mix together the egg yolks and key lime juice.  Add in the sweetened condensed milk.

2. Whip the egg whites until soft peaks form, fold into the Key Lime batter

3. Pour into a Graham cracker crust

4. Bake at 350 for 30-40 minutes.  The pie will rise and crack, and edges should be a little brown.  It’s ok if it’s a little wobbly, it’ll firm up as it cools.

5. Cool completely and serve.  Store any leftovers in the fridge.

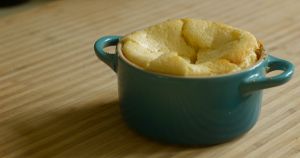
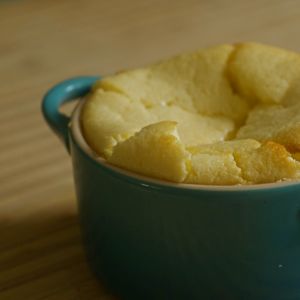
We tried using 4 egg whites instead of three, and had a little too much filling to handle, so we made a little extra pot on the side that we could eat right away.  Weee!

Published in: on July 25, 2009 at 6:08 pm  Comments (4)  

Chocolate Truffles in Four

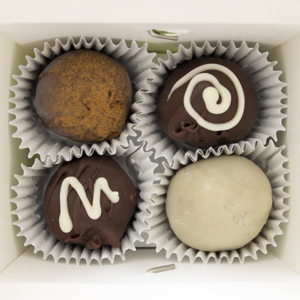
truffles-sm

Clockwise from top left: cinnamon, chili, and cayenee; raspberry; almond, covered with marzipan; cointreau (orange)

It’s been a while since I wrote, I know.  I’ve got a whole pile of photos from December 2008 that I meant to write about over the holidays, but, well, things were a little too hectic and it didn’t happen.  Then my semester started and I really didn’t happen.  But I’m back from spring break, I’ve got some time on my hands, and I’m ready to share!

I love truffles… LOVE truffles.  So much so I decided one year I was going to try and make chocolate truffles flavored with with liquor.  I was delighted to find the recipes were actually quite simple.  So I tootled down to the liquor store to peruse the selection of nips, thinking I’d pick two flavors.  Instead, I ended up returning home with 6 bottles (Amaretto, Frangelico, Grand Marnier, RumpleMinze, Chambord, and Bailey’s) because I couldn’t decide which to make!  That first year I made a triple batch of truffles.  Even I can’t eat that much chocolate!  Fortunately, I decided to take on this endeavor in December and suddenly I had a pile of Christmas presents for my co-workers.  The only problem was, the truffles didn’t stay solid at room temperature, must to my dismay.  One flavor didn’t even make it to truffles because it was so soft (note: skim milk is NOT an appropriate substitute to top off that 1/2 cup of heavy cream).  That one I just ate with a spoon.  In any case, I was determined to try again with better success next year, and researched online to become an amateur chocolatier.

December 2008 was my 4th year making truffles, and wow, I don’t mind patting myself on the back for a job well done!  I have experimented with chocolate, flavors (moving beyond liquors), and mastered a tempered chocolate coating.  So here are a few tips I have learned along the way:

1. Find good chocolate with a high percent cocoa.  This year I used Callebaut, a 60% Belgian Chocolate.  It worked like a dream.  The past three years I used Ghirardelli semi-sweet chips.  The key is that you need to adjust the cream to the percent of cocoa in the chocolate.  More cocoa makes the truffles harder so they will maintain their shape at room temperature.  Too much cream (which was often my problem with Ghirardelli), and you’ll we working out of your freezer to keep everything solid.  It’s worth while testing a small batch to check your ration of chocolate to cream.  Seriously, this is the crux of easy truffle making.  Take your time, let the truffle mix cool for many hours before you check how solid it is for rolling.  Get the ration right. 

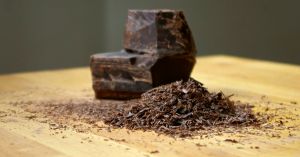
2. Shred the chocolate very fine.  Normal size chocolate chips will not melt fast enough in hot cream.

shaved-chocolate

3. The choice of flavor alters the hardness of the truffle as well.  Use less cream if you’re going to flavor with a liquor, more if you’re going to favor with a power.

4. Be as precise with measurements as you can.  I bought a scale this year so I could weigh out my chocolate.   My roomies will probably laugh at me for this comment, as I still don’t know how much cinnamon and chili powder went into my batch of truffles this year, but they sure were a hit.

5. If you’re going to coat the truffles in chocolate, learn to temper chocolate.  This does require a thermometer.  For some reason I decide to torture myself this way every year.  Or maybe I do it just because I have a better surface for decorations.

6. If you’re sending truffles to your best friend who loves chocolate more than anything, and has no self restraint, you may want to send her husband his own box to hide away.  Or you could just tell him “tough-luck” for being too slow.

Now, to choose your flavors.  Liquors work very well.  I have also used Cointreau (one of my roomie’s favorites), blackberry liquor, and Kahlua. This year I also made a raspberry syrup by reducing frozen raspberries with some sugar and water, and then straining out the seeds with a fine mesh strainer (my favorites this year).  Extracts, such as almond, are very tasty, and there’s an array of options at the grocery store.  I also tried out dried spices, with cinnamon, chili powder, and a sprinkle of cayenne.  All of these flavors are added after the chocolate and cream are mixed together.  I have read about people who steep cardamom seeds or tea bags in their cream as it simmers.  I’m sure it’s tasty, and perhaps I’ll try it next year.

So here it is, the basic truffle recipe.  

Truffle Ganache: make approximated 30 truffles (1/2 inch diameter)

4 oz of 60% chocolate, finely shredded
1/4 c heavy cream (use less if flavoring with a liquid, or using a lower % cocoa chocolate)
1 T. corn syrup
1T. Butter (softened)

1. Heat the cream and corn syrup until simmering

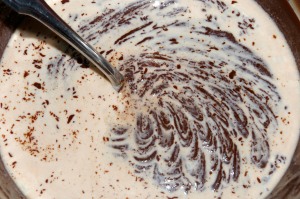
2. Pour about half the cream over the chocolate and stir, adding as few bubbles as possible.  It looks pretty cool as you stir:

_igp6723

3. When the mixture starts to smoothen, slowly add in the rest of the cream.  Taste it, make sure it’s sweet enough for you.

4. Stir in the butter.  The Callebaut chocolate was a little too bitter for me, so I ended up adding a little extra corn syrup, but the butter was the magic touch.  It just smoothed out the taste to smooth-silky perfect.

5. Stir in your flavoring, and again, taste and adjust as necessary.  Your end product should be smooth and glossy.

6. Allow the mixture to cool for 4 hours at room temperature.  Keep it away from direct heat.

Now, if you’re like me, and you don’t really pay attention to measurements (this is a do-as-I-say-not-as-I-do recipe), your ratio may be a little off.  I’ve come to have a pretty good idea how the ganache should look when it’s warm, after everything is all mixed together.  The bowl still feels warm in your hands, but you can very comfortable dip a finger in to taste some.  There’s a lot of heat in the mixture that needs to leave before you can form it into balls.  I would say dragging a spoon through it should leave a bit of a mark, but a little jiggling to the bowl will smoothing things out.  If the path of the spoon fills right in on it’s own, there’s too much cream. Also, you can probably form some soft peaks with the mixture at this point.  It’s much easier to correct the mixture at this stage by adding in a little more cream or a few more chocolate shavings.   Some times I’ve heated the bowl over a pan of steaming water, or for 5-10 seconds at a time in the microwave, just to add enough eat to melt the extra chocolate.

If things have cooled down, and the mixture is still too soft, you have a couple options.

1. Put it in the fridge or freezer for another 4 hours and work from there.  And tell the receivers of these chocolaty treats to keep them in the fridge.

2. You can reheat the whole thing and add more chocolate.  But a word of caution: heat slowly and be patient.  If you overheat the chocolate at this point, it will separate and you will be cursing the demise of your chocolaty confection.  If this happens, you may be able to save it if you immediately remove it from the heat, add a touch of fresh cream and stir vigorously!

Shaping the truffles:

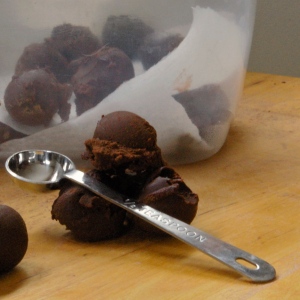
There are a couple ways to go about this.  Some people will put the warm ganache into a pastry bag and pipe out little blobs onto parchment paper.  This year I found some half-sphere metal teaspoons and used the 1/2 teaspoon like an ice cream scoop.  The trick is to keep a mug of boiled water on hand to dip the spoon into.  The hot metal scoops the ganache beautifully.  I reheated and dried the measure with a paper towel every 3 truffles.

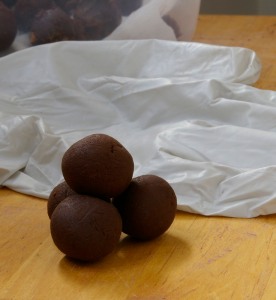
Once ball-like shapes are formed, put them in the fridge for an hour.  Roll each ball between your palms until round.  I highly suggest donning latex or some kind of plastic glove for this part.  It protects the truffles from the full heat of your hands.  At this point, your can roll the truffle in cocoa powder, or powdered sugar, or chopped nuts, or you can put them back in the fridge for coating in chocolate later. 

_igp6733_igp6746


Coating truffles with tempered chocolate:

I defer to other resources on tempering chocolate.  Baking 911 was a great resource.  Once my chocolate was tempered, I dropped in a ball, used a fork to cover it in chocolate, lifted it out, tapped it on the size to get off the extra chocolate, and dropped it on parchment to harden.  Once everything was done, I piped melted white chocolate in different designs on top.

Published in: on March 26, 2009 at 9:45 am  Comments (10)  

Ricotta

It’s been a while, I know.  But when Lauren of Recipes to Rivals decided to make Ricotta this month, something I’ve been meaning to try since I learned how easy it was this summer, well, I couldn’t resist.  And boy, it hardly takes any time at all.

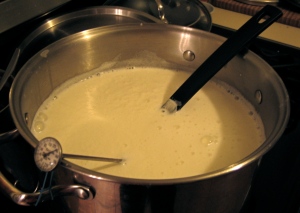
I picked up a gallon of the freshest organic milk I could at the local grocery store.  I was hoping to buy the local Pittsford Dairy brand, but it was not available.  That and a quart of butter milk and I was set.  I dug out our biggest pot, poured it all in, and set the burner on medium high (there was a lot of liquid to heat).

img_2354

I had other things to do that evening, mainly, make myself dinner.  So I slung the meat thermometer over the side, securing it with a rubber band on the handle of the pot, and just left a big spoon in the pot for easy stirring every time I strolled by.  It took a while, but as the temperature approached 85, magic started to happen.  Curds formed in the foam on top.  I stirred them in, but they kept forming and forming, and before I knew it, I had translucent whey (sorry, I forgot to snap a picture).

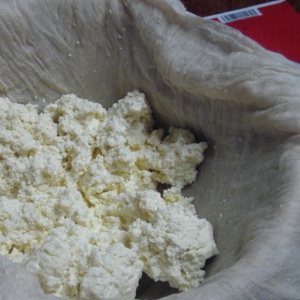
Next, the curds had to be strained.  The challenge called for fine cheesecloth.  I had some natural cheescloth that didn’t look too fine to me, so I folded the whole thing up to make 4 layers and straining was prefect!

img_2363

I let the curds drain for a while, and also tried to squeeze some of the moisture out.  That wasn’t such a good idea.  I ended up with a few large curds that didn’t mix very easily in next days dinner.  Next time, I’ll just leave everything to drain for half-an-hour and then package it away.

I ended up making Ricotta and spinach filled Cannelloni, and my roommate used a little bit to make some cannoli, like in some earlier posts.

Very tasty, very easy, and well worth a second try… hopefully with super fresh milk!

Published in: on February 28, 2009 at 12:20 am  Comments (9)  

Cheesy-poofs!

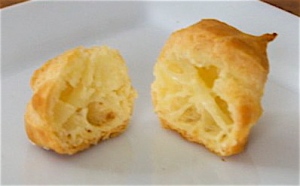
This month, Recipes to Rivals made Cheesy-Poofs!  I love Cheesy-Poofs!  Technically, they’re called Gougères, but I find Cheesy-Poofs to be much easier and more fun to say. [Shhhhhh, don’t tell my french-speaking boyfriend!]

imgp6851

The theme was appetizers, and we have three options, of which we had to make two.  I made Cheesy-Poofs and a blue cheese, walnut, and pear crostini.  Both were cheesy, savory, and delicious.  First, the Cheesy-Poofs:

I made Gougeres this past summer from a Tastespotting post. I love Greyure cheese, which these french balls of air are traditionally made with.  I think my favorite part is watching them puff up in the oven.  It seems almost magical!  From the Recipes to Rival Challenge:

Gruyère Cheese Gougères, from ‘The French Laundry Cookbook’ By Thomas Keller, November, 1999
Makes about 4 dozen gougères—I halved the recipe, and still ended up with a good 50 poofs.

Gougères are a classical preparation often served at wine tastings in France. The puffs are made from a savory pâte á choux, or cream puff dough-flavored here with Gruyère. They are best served hot out of the oven, offering that creamy-dough gratification. Don’t add the cheese, and the puff is a base for a dessert.

1 cup water
7 tablespoons (3-1/2 ounces) unsalted butter
1 tablespoon kosher salt, or more to taste
Pinch of sugar
1-1/4 cups (5 ounces) all-purpose flour
4 to 5 large eggs
1-1/4 cups grated Gruyère (5 ounces)
Freshly ground white pepper

Preheat the oven to 450 degrees F. Line two baking sheets with parchment paper.

In a medium saucepan, combine the water, butter, salt, and sugar and bring to a boil. Add all the flour at once, reduce the heat to medium, and stir with a wooden spoon for 2 minutes, or until the mixture forms a ball and the excess moisture has evaporated (if the ball forms more quickly, continue to cook and stir for a full 2 minutes).

Transfer the mixture to the bowl of a mixer fitted with the paddle and beat for about 30 seconds at medium speed to cool slightly. Add 4 eggs and continue to mix until completely combined and the batter has a smooth, silky texture. Stop the machine and lift up the beater to check the consistency of the batter. The batter in the mixing bowl should form a peak with a tip that falls over. If it is too stiff, beat in the white of the remaining egg. Check again and, if necessary, add the yolk. Finally, mix in 3/4 cup of the Gruyère and adjust the seasoning with salt and white pepper.

Fill a pastry bag fitted with a 3/8-inch plain pastry tip with the gougère batter. Pipe the batter into 1-tablespoon mounds on the baking sheets, leaving about 2 inches between the gougères as the mixture will spread during baking. Sprinkle the top of each gougère with about 1/2 teaspoon of the remaining grated cheese and bake for 7 to 8 minutes, or until they puff and hold their shape. Reduce the heat to 350 degrees F. And bake for an additional 20 to 25 minutes. When the gougères are done, they should be a light golden brown color. When you break one open, it should be hollow; the inside should be cooked but still slightly moist. Remove the pans from the oven and serve the gougères while hot.

imgp6847

You can also freeze them after piping them onto the parchment paper and cook whenever you like.  I did this with half tha batch and it worked very nicely.

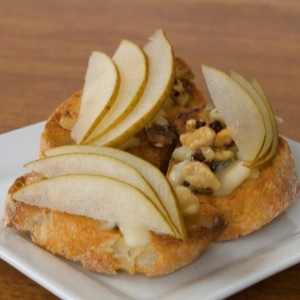
And now the blue cheese, walnut, and pear crostini.  The whole idea of this appetizer was to try out this trio of ingredients which are rumored to go so well together.  I do love blue cheese, but seldon use it because I can’t think of that many uses for it.  This one was incredibly easy and delicious and definately to keep on hand.

I started with a small sourdough loaf, cut on a diagonal, brushed with olive oil on one side and toasted.  As soon as the slices come out of the toaster oven, I took a cut side of a clover of garlic and rubbed it on each slice.  This is a great way to add a hint (or a lot) of garlic flavor.

Next, I crumbled a mild blue, a gorgonzola on top of each crostini, and popped everything back in the toaster oven to melt.   As this was all going on, I was toasting some chopped walnuts in a pan on the stove and thinly slicing my pear.  Once the cheese looks nice and soft, I sprinkled on some still-warm walnuts and fanned a few slices of pear on top.

imgp68421

All in all, I’ve got two new appetizers under my belt for a quick idea when I need it.  Enjoy for your future parties!

Published in: on January 1, 2009 at 11:03 am  Comments (7)  

R2R: Butternut Squash Soup

Butternut Squash Soup

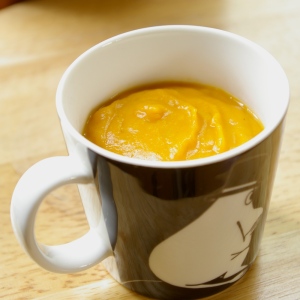
One of my all time favorite soups is roasted butternut squach soup.  I love when I see the butternut squash start to appear at the public market because it means the weather is really getting cold and it’ll be time to make this soup soon.  I was so excited to find this month’s Recipe to Rivals challenge (picked by MegPug of Joy Through Cooking) was all about squash soup using home made stock.  I also have been looking to try my hand a stock since watching past episodes of Alton Brown on YouTube.

The recipe I’ve always used comes from the magazing Eating Well and it’s very simple:
– roast squash, pears, tomatoes, leeks, and garlic into oblivion
– blend with stock/broth
– season with salt, pepper, nutmeg, and cinnamon, or whatever spices you fancy
– serve with crusty bread and consume.

Ok, I’ll be honest.  I forgot about the creme fraiche (one of the requirements to the recipe).  I don’t really like it, and I also don’t find much occasion to use whipping cream, so I didn’t buy any of that to add either.  However, I have a diary based suggestion that I’ve used in the past:  Stilton.  Yes, the stinky cheese.  The recipe from Eating Well called for a little Stilton sprinkled on top.  I suggest looking for a milder Stilton, but it does give a lovely flavor to the soup that works surprisingly well with the soups sweetness.  I also like to add a kind of garlic crouton (really, it’s just crusty piece of toast with some garlic rubbed on and a drizzle of olive oil; crusty sourdough loaves work great).  The crunch of toast contrasts the smooth soup wonderfully.

Here is the Eating Well recipe as I remember it (I’m typing this at my parents (home for the holidays), and the recipe is at home in another state).  It’s a pretty flexible recipe, so I’m not too concerned about amounts:

– One butternut squash, cubed
– 4 medium tomatoes, quartered and seeded
– 2 bosc pears, pealed, quartered and cored
– 1-2 leeks, rinsed well and sliced
– 4 cloves of garlic
– 4-6 cups of stock
– salt and pepper
– olive oil
– seasoning as desired at the end (I suggest nutmeg and cinnamon, true fall flavors)

1. Preheat the oven to 400 or 450.

2. Put the squash, tomato, pears, leeks, and garlic on a cookie sheet with high sides or a large baking dish.  Everything should cover the bottom of your pan, but not pile too high because it will take longer to roast.

3. Drizzle to coat with olive oil and season liberally with salt. Toss everything together

4. Roast everything to oblivion (1-2 hours), stirring every 10-20 minutes.  I’m serious, oblivion.  It should reduce to about half the volume and the squash should be browning around the edges.  Everything should be falling apart into mush.  The longer it goes, the more the sugars in the squash caramelize and make a sweet soup.  You will not be sorry if you over roast everything… just take it out before things begin to char.

5. Blend with the stock, using as much as necessary to get the desired consistency.  I use my stand up blender and scoop some of the roasted mush in, and then fill to the level of veggies with stock.  Hold the lid down FIRMLY with a pot holder.  Be careful hear or you’ll get 400 degree mush all over your kitchen and yourself.  Blend until a cyclone forms in the blender.  You also can put the stock and roasted mush into a pot and use an immersion blender.

6. Pour the blended soup into a pot (if it’s not already in one), reheat and season to taste.

7. Garnish with a nice Stilton and serve with toasted sourdough rubbed with garlic

For the stock, I used the recipe provided by MegPug:

Vegetable Stock:
4 quarts water
2 white onions
4 carrots, peeled
2 leeks
6-8 button mushrooms
Bouquet garnish (parsley, bay leaves, peppercorns)

Boil the hell out of it and strain through a fine seive or cheesecloth.

Published in: on December 1, 2008 at 4:52 pm  Comments (9)  
Tags: , ,

Throwing Pizza Dough

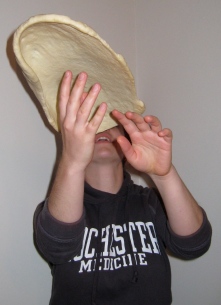
We had to throw the pizza dough.  Ya know, toss the dough up in the air, spinning it around to flatten it out.  That whole thing.  That was the one rule for this month’s Daring Baker’s Challenge.  And we had to catch it on camera.
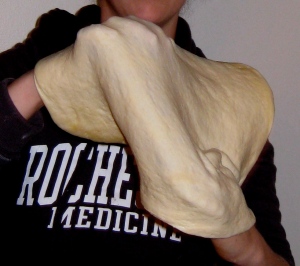
I’ve thrown pizza dough before, although I don’t remember whom I learned from.  It is by far the easiest and quickest way to stretch out dough to make some pies.   However, I can’t thrown and photograph at the same time.  Even that is a little too much coordination for me.  Roomies could be enlisted, but better yet, why not invite a few friends and we could all try throwing pizza.  And so I threw a pizza throwing party.

For the participants in Daring Baker’s (an online baking group where participants try the same recipe each month and blog about the experience) who had no idea how to throw pizza, video links were provided.  My favorite video depicts a portly man in a pizzeria kitchen deftly stretching a circle of white dough over the back of his hands, humming or singing in Italian to That’s Amore which plays in the background.  He throws the dough up towards the 20-foot ceiling.  It sails into the air like a wobbly Frisbee, growing to two or three feet in diameter.  He tosses, and tosses, and nearly drops it, and tosses again until he finally slaps it down on a large pizza peel.  My dinning room ceiling isn’t that tall, and I contemplated washing it in case someone tossed the dough a little too high.  I did opt to clean the floor in case some dough got dropped.

Dough is not that hard to make, especially with the use of an electric mixer.  I’m always excited to use the kitchen aid mixer I stole from my brother (he wasn’t about to take it to London with him, now was he?).  Although it tends to collect dust sitting in the corner of the kitchen, better it collects dust in my kitchen than my parent’s garage.  [It’s also a terracotta red (limited edition from William-Sonoma), which my favorite color, ever.  My brother doesn’t know it yet, but he’s never getting it back because I’m designing my dream kitchen around that appliance once I become a rich doctor…one day.]

I digress… dough… not that hard: a little yeast, a little sugar to feed the yeast, a little salt to keep things savory, some olive oil to keep things from getting too sticky, a boat load of flour, and just enough water to bring it all together.  I made the dough the night before.  Dough of the bread-variety takes time.   It needs its beauty rest to give it stretch and elasticity.  It you start working it too soon, it tears.  Very sad.  There’s some chemistry going on here with the gluten in the flour, but I don’t remember exactly what, just that patience and time are important.  [Two things I don’t always have when it comes to dough, much to my detriment when I try to squish and squish pizza dough into the shape I want, and it just scrunches back into the ball it started as.  It’s a fight the dough always wins.]

The electric mixer is great, but it dough still needs a little loving touch.  Did I mention this recipe made a ton of dough, enough for 4-6 pizzas?  That’s a lot for my weak arms to knead, so I resorted to standing on a milk crate to give myself enough height to put my weight into it.  When I retire from medicine to become a chef or a baker, I’ll have the arms of a bread maker who kneaded bread every day.  For now I’ll stick to the heavy-book-bag curl.   Once all the flour and moisture was well incorporated, I split the dough into quarters, formed them into balls, and tucked them in the fridge on an oiled pan.  Then it was on to batch number two.
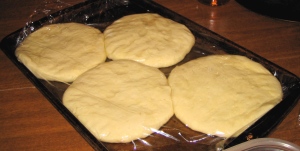
Disk of dough all snuggled together!

Disk of dough all snuggled together!

The next day, two hours before we would be throwing, I formed the balls into thick disks.  By this point, all that moisture-flour chemistry that was going on in the fridge overnight made the dough pretty elastic, too elastic in fact.  It comes out of the fridge cold and cranky, and there’s just no way a baseball size hunk of dough is going to flatten into a 16-inch, thin crust pizza in one go.  It needs time to rest between stretches.  The instructions were pretty adamant about a two-hour rest.  I don’t know if the dough is too stretchy if you wait much longer.  My dough sat around for three hours, and it was pretty stretchy in the middle, but that could have been our faulty technique.

My friends arrived and we started preparing the toppings.  I’ll get to those in a moment, but first, the throwing!  I demonstrated first, covering one of the disks of dough with a lot of flour.  I laid it over the back of my hands, off center.  By now the dough was super stretchy and I didn’t want the center to get thin too quickly.  I tossed it a few times, and it was already getting thin.  My roomie, M., stood ready with her digital camera, but the timing of the click and the toss was pretty hard to capture.  I stopped throwing when it felt like I was about to punch a fist through the dough.  I laid it on the pizza pan, pre-coated in semolina flour to keep it from sticking.  The edges were a little thick, so I stretched those out a little bit.  My friends, S., A., and R., also took turns throwing.
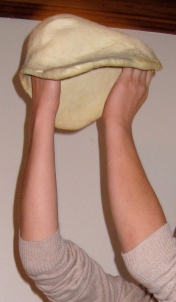

[Up…..                              Up…..                            and Away!]

We caught a few good photos and a lot where we looked pretty dorky.  [My apologies to my friends for putting up any dorky photos on this post.] When we had two pies tossed and stretch, it was time to add the toppings.

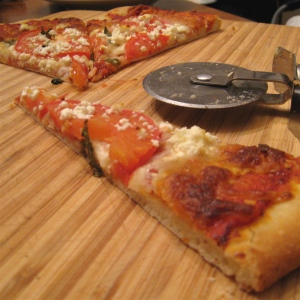
Oh, the toppings [yum yummm yum]… such delicious options!  Tomato, basil and feta is one of my all-time favorite pizzas.  I also LOVE breaded eggplant, which we paired with baby Portobello mushrooms.  These two pizzas got home-spiced sauce made from tomato paste and Italian herbs and a healthy layer of mozzarella.

My roommate, M., decided to recreate a mashed potato and bacon pizza from one of her favorite dives in New Haven, where she went to college.   It includes: bacon [yum], garlic sautéed in bacon fat [double yum], and garlic mashed potatoes [scrumptious], all topped with cheese.  When I told my boyfriend about this concoction over the phone, he was appalled on the other end of the line: “Starch on starch!  Who came up with that idea?!”  Well, I know he’s a purist when it comes to Italian cooking [please note: he’s not Italian], but I don’t care because it was delicious.  And anything that makes my house smell of bacon perfectly fine by me [ha-rumph!].
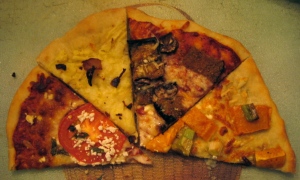
Tomato and feta; bacon and mashed potato; eggplant and mushroom; butternut squash and leeks

Our last pizza took advantage of the enormous butternut squash I bought at the farmer’s market the week before.  We roasted a few slices, along with some leftover leeks from a butternut squash soup, and threw that on a pie with some olive oil, garlic, and goat cheese.  Hot damn, it was good.  Squash, leek, and goat cheese really should be combined way more often.

All the pizzas were baked at 400 degree Fahrenheit on a pizza stone for about 20 minutes.  The stone should be placed in the lower half of the oven so the dough browns on the bottom and the cheese gets bubbly on top at just the same time.  Then pull out the pie, take a pizza cutter to it, and enjoy!

BASIC PIZZA DOUGH
Original recipe taken from “The Bread Baker’s Apprentice” by Peter Reinhart.

Makes 6 pizza crusts (about 9-12 inches/23-30 cm in diameter).

Ingredients:
4 1/2 Cups (20 1/4 ounces/607.5 g) Unbleached high-gluten (%14) bread flour or all purpose flour, chilled –
1 3/4 Tsp Salt
1 Tsp Instant yeast
1/4 Cup (2 ounces/60g) Olive oil or vegetable oil (both optional, but it’s better with)
1 3/4 Cups (14 ounces/420g or 420ml) Water, ice cold (40° F/4.5° C)
1 Tb sugar
Semolina/durum flour or cornmeal for dusting

DAY ONE

Method:
1. Mix together the flour, salt and instant yeast in a big bowl (or in the bowl of your stand mixer).

2. Add the oil, sugar and cold water and mix well (with the help of a large wooden spoon or with the paddle attachment, on low speed) in order to form a sticky ball of dough. On a clean surface, knead for about 5-7 minutes, until the dough is smooth and the ingredients are homogeneously distributed. If it is too wet, add a little flour (not too much, though) and if it is too dry add 1 or 2 teaspoons extra water.

NOTE: If you are using an electric mixer, switch to the dough hook and mix on medium speed for the same amount of time.The dough should clear the sides of the bowl but stick to the bottom of the bowl. If the dough is too wet, sprinkle in a little more flour, so that it clears the sides. If, on the contrary, it clears the bottom of the bowl, dribble in a teaspoon or two of cold water.
The finished dough should be springy, elastic, and sticky, not just tacky, and register 50°-55° F/10°-13° C.

3. Flour a work surface or counter.  Line a jelly pan with baking paper/parchment. Lightly oil the paper.

4. With the help of a metal or plastic dough scraper, cut the dough into 6 equal pieces (or larger if you want to make larger pizzas).

NOTE: To avoid the dough from sticking to the scraper, dip the scraper into water between cuts.

5. Sprinkle some flour over the dough. Make sure your hands are dry and then flour them.  Gently round each piece into a ball.

NOTE: If the dough sticks to your hands, then dip your hands into the flour again.

6. Transfer the dough balls to the lined jelly pan and mist them generously with spray oil. Slip the pan into plastic bag or enclose in plastic food wrap.

7. Put the pan into the refrigerator and let the dough rest overnight or for up to thee days.

NOTE: You can store the dough balls in a zippered freezer bag if you want to save some of the dough for any future baking. In that case, pour some oil(a few tablespooons only) in a medium bowl and dip each dough ball into the oil, so that it is completely covered in oil. Then put each ball into a separate bag. Store the bags in the freezer for no longer than 3 months. The day before you plan to make pizza, remember to transfer the dough balls from the freezer to the refrigerator.

DAY TWO

8. On the day you plan to eat pizza, exactly 2 hours before you make it, remove the desired number of dough balls from the refrigerator. Dust the counter with flour and spray lightly with oil. Place the dough balls on a floured surface and sprinkle them with flour. Dust your hands with flour and delicately press the dough into disks about 1/2 inch/1.3 cm thick and 5 inches/12.7 cm in diameter. Sprinkle with flour and mist with oil. Loosely cover the dough rounds with plastic wrap and then allow to rest for 2 hours.

9. At least 45 minutes before making the pizza, place a baking stone on the lower third of the oven.  Preheat the oven as hot as possible (500° F/260° C).

NOTE: If you do not have a baking stone, then use the back of a jelly pan. Do not preheat the pan.

10. Generously sprinkle the back of a jelly pan with semolina/durum flour or cornmeal. Flour your hands (palms, backs and knuckles). Take 1 piece of dough by lifting it with a pastry scraper. Lay the dough across your fists in a very delicate way and carefully stretch it by bouncing it in a circular motion on your hands, and by giving it a little stretch with each bounce. Once the dough has expanded outward, move to a full toss.

NOTE: Make only one pizza at a time.
During the tossing process, if the dough tends to stick to your hands, lay it down on the floured counter and reflour your hands, then continue the tossing and shaping.
In case you would be having trouble tossing the dough or if the dough never wants to expand and always springs back, let it rest for approximately 5-20 minutes in order for the gluten to relax fully,then try again.
You can also resort to using a rolling pin, although it isn’t as effective as the toss method.

11. When the dough has the shape you want (about 9-12 inches/23-30 cm in diameter – for a 6 ounces/180g piece of dough), place it on the back of the jelly pan, making sure there is enough semolina/durum flour or cornmeal to allow it to slide and not stick to the pan.

12. Lightly top it with sweet or savory toppings of your choice.

NOTE: Remember that the best pizzas are topped not too generously. No more than 3 or 4 toppings (including sauce and cheese) are sufficient.

13. Slide the garnished pizza onto the stone in the oven or bake directly on the jelly pan. Close the door and bake for abour 5-8 minutes.

NOTE: After 2 minutes baking, take a peek. For an even baking, rotate 180°.

If the top gets done before the bottom, you will need to move the stone or jelly pane to a lower shelf before the next round. On the contrary, if the bottom crisps before the cheese caramelizes, then you will need to raise the stone or jelly.

14. Take the pizza out of the oven and transfer it to a cutting board or your plate. In order to allow the cheese to set a little, wait 3-5 minutes before slicing or serving.
Published in: on October 29, 2008 at 6:00 am  Comments (11)  

Dumplings

Seven weeks and two exams into our second year of medical school and my roomies and I hadn’t had dumplings for dinner yet.  Problem was, we hadn’t had time for a dumpling-making party.  I was so excited when this month’s Recipes to Rival challenge was dumplings.  We could fill them with anything, but we had to make our own wrappers.  Finally, we had a deadline for making dumplings.

I’ve never been a huge fan of dumplings until my roommates and I had a dumpling making party last year.  I just never had an occasion to eat them until we had bags of frozen homemade dumplings in the freezer for pre-exam week.

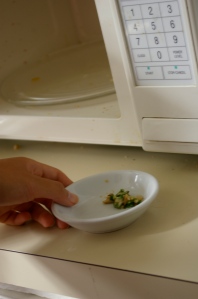
The recipe is one of those recipes my Chinease-American roommate, S, grew up on.  The kind where you just throw a bunch of ingredients together and season it until it tastes right (microwaving little spoonfuls to cook the raw meat).

Here’s what the filling usually includes, with estimates on amounts.

– 1 lb. ground chicken
– 10 large shrimp, minced
– 1 c boiled Chinese cabbage, shredded
– 3-4 chilves, chopped fine
– a boat load of chives, chopped fine
– a thumb of shredded ginger
– an egg or two, depending on how wet the filling is.
– oyster sauce, to taste
– soy sauce, to taste
– sesame oil, to taste
– we might have added salt and pepper, to taste

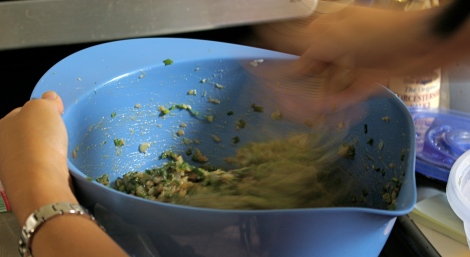
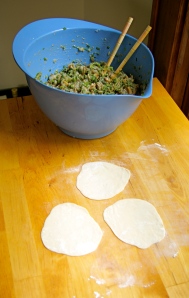
This all gets mixed up with chopsticks, which was a little difficult with the enormous bowl of filling we were making.  It’s best to let all the flavor’s marinade together overnight.  On this occasion I was a little crunched for time.  I was flying to visit my boyfriend for the weekend and only had the afternoon to make, fill, and photograph the dumplings for this post.

Knowing time would be short, I tried to make the dumpling wrappers ahead of time, hoping they would store in the fridge overnight in a stack… after all, the store-bought dumpling wrappers came in a neat little stack.  I made a half recipe:

– 2 c flour
– ¼ t salt
– About ¾ c of hot water, added in ¼ c increments, to bring the flour together.

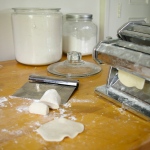
I kneaded and kneaded the dough into a super smooth ball, being quite liberal with the flour to prevent sticking.  I let the dough sit for about 6 hours before I got around to rolling it out.  For this, I brought out my pasta roller.  I floured everything up, rolled the dough into a 1 in log and cut little ½ in disks off for flattening.  Covering each disk with more flour, I patted it into a circle and rolled it through the pasta roller, turning the dough 90 degrees to keep it as close to a circle as possible.  Again, more flour, and then I stacked them up for storage.  I made 40 wrappers with the half recipe.

Here’s where I ran into trouble.  Stacking doesn’t work so well because the dough absorbs any extra flour covering it and turns into a stick mess within an hour.  I had to scrap my entire first rolling.  The second time around, I stored the wrappers in stacks of parchment paper.  The dumplings still stuck to the parchment paper, but I was able to carefully pull them off, flour them up, again, and wrap dumplings.  Rolling out the wrappers really doesn’t take long if you have a pasta roller on hand, but you really ought to do it right before you plan to fill the dumplings.

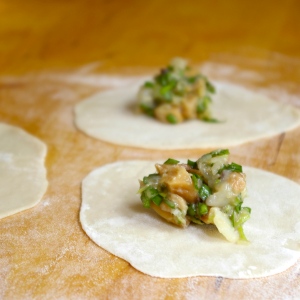
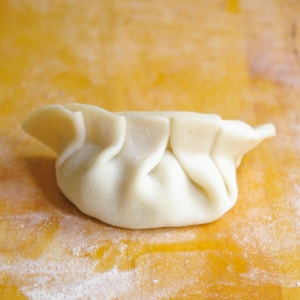
Each wrapper was about 3 inches in diameter and about 1mm thick.  We scooped about 1 tablespoon of filling into each, wet the edge of the wrapper with water all the way around and sealed.  One half of the wrapper gets a few pleats folded in to make a little larger pocket for the filling.  Cute little guys aren’t then?

Most the dumplings we freeze (we do make about 100 of them at a time), but a few we’ll cook right away.  I’m not quite sure how long we cook them for.  The way S does it is she boils a pot of water and dumps in 15-20 dumplings.  Then when it comes to a boil again, she removes 1 cup of water, replacing it with 1c of cold water.  She lets it come to a boil again and repeats this twice more.  Then the meat should all be cooked.  I’m sorry I don’t have any pictures of the cooked dumplings, we were too hungry after all this work of putting them together that we just scarffed them down.  We’ve got another exam in less than two weeks… there’s a good chance we’ll be making some more.  Perhaps I’ll take a study break to photograph the finished product.

Although store-bought dumpling wrappers are far easier to deal with, I’m glad to know I can whip up some of my own without too much trouble.

Published in: on October 1, 2008 at 6:04 am  Comments (12)  

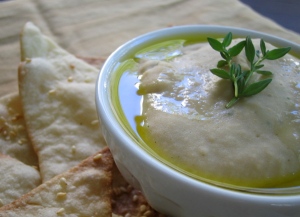
White Bean and Sage Dip

This dip I made to accompany my cracker challenge from Daring Bakers.  The rules were it had to be vegan and gluten free.  I decided my best bet was to peruse my Vegetarian Cooking for Everyone pilfered from my mother (I’m after her bread cookbook next).  I found a number of recipes that sounded super tasty, except it called for something dairy or an egg.  Clearly, I’m not cut out to be vegan.  But part of Daring Baker Challenges are to make something outside my usual recipe repetoir (they had that covered with the crackers), so I decided I’d take a stab at the White Bean and Sage dip.  Besides, I had a growing sage plant in my herb garden that I had no idea what to do with and this recipe called for 10 leaves!

It’s a pretty straighforward recipe:

1. Roast a head of garlic
1b. Boil beans and sage leaves together for 1.5 hours… 1.5 hours! Hell no! Luckily my roomie who owns the pressure cooker was in ear shot and suggested I use the pressure cooker.  “It’ll take 20 minutes!”  Half an hour, actually, but still super quick.
3. Blend everything together and season to taste.

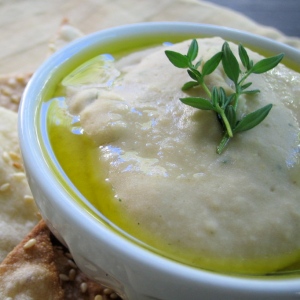
I recommended NOT skimping on the lemon or the olive oil, both add a great depth to the flavor.  The end product reminded me a lot of humus in texture, and color, but with a slightly different flavor.  I might make this again for a party, but the recipe made a little too much for me to get through.

White Bean and Sage Dip
Adapted from Vegetarian Cooking for Everyone

-1 1/2 c Cannallini beans
-5 Cloves garlic
-10 sage leaves
-2 bay leaves
-3 T Olive oil
-1 whole head of garlic
-Juice of one lemon
-1 T chopped thyme
-Salt and pepper

1. Roast the whole head of garlic in a baking dish with a little water at 350 degree for 45 minutes.  You should be able to squeeze out the garlic.

2. Boil beans in a pot of water (covering beans by 2 inches).  Lower to a simmer and add the bay leaves, sage, and 5 cloves of garlic, and 2 T of oil.  Simmer for 1.5 hours, or 30 minutes in a double boiler.  Cook until the beans are tendor.  Remove the bay leaves.  Drain and save the extra bean broth.

3. Blend the roasted garlic and pot of beans (sans bay leaves), lemon, olive oil, adding enough bean broth to the desired consistency.  Season to taste.  I suggest not skimping on the olive oil or the lemon.

4. Stir in the chopped thyme and serve warm with crackers.

Published in: on September 27, 2008 at 8:46 am  Leave a Comment  

Going Crackers!

Med school hasn’t made me crackers yet, at least not before I could make crackers.  Har Har! I crack myself up… no pun intended (yeah right!)

Enough with the cheese, on with the baking!

I never thought making crackers could be so easy, and so delicious!  I was a little intimidated by this month’s Daring Baker Challenge, but one evening when I wasn’t so inclined to open my books I thought I’d give it a shot.  The ingredients were simple:

1 1/2 cups bread flour
1/2 tsp salt
1/2 tsp instant yeast
1 Tb sugar
1 Tb vegetable oil
1/3 to 1/2 cup water, at room temperature

Mix all together, adding enough water to bring the dry ingredients into a ball and knead.

The kneading, not so simple.  My roommate and I took turns taking out our aggressions on the dough, and giving our hands a workout!  The recipe says knead for 10 minutes, or until the dough passes the windowpane test: stretch a piece of dough thin enough so you can see light through it, but if it tears you need to keep kneading.  I was kneading for 20 minutes.  Then the dough sat for an hour in an oiled bowl set in a warmed oven and then I got to rolling. This recipe specified for one sheet of crackers, but I decided to cut the dough in half for some super thin crackers.

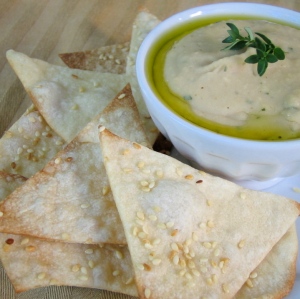
You need to roll the dough on an oiled surface.  It sticks a little more, which helps to combat the elasticity of the dough.  Floured surfaces do not work.  I was surprised how easy it was to roll out.  I thought I’d have to let the dough rest frequently, but it wasn’t a problem… until I baked it and found how unevenly I had rolled my dough.  The dough bakes on parchment paper at 350 for 10-20 minutes, depending on how thin it is.  Areas of my crackers got quite brown while other parts never quite cooked enough for a true cracker crunch.  I let them finish up on the pan for 10 minutes out of the oven before I started breaking them apart.  Despite variable textures, they were very tasty with the sesame seeds I sprinkled on top.  You only see a few in the pictures because sesame seeds don’t like to stick.  I later found suggestions on the Daring Baker forum that you really need to roll the sesame seeds into the dough to get them to stay.  Before baking I scored them with a pizza cutter for easy separation.

The crackers were accompanied with a White Bean and Sage dip (vegan and gluten free as directed).

Full directions from Natalie of Gluten A Go Go and Shel of Musings From the Fishbowl:

Makes 1 sheet pan of crackers [I made two sheet pans]

* 1 1/2 cups (6.75 oz) unbleached bread flour
* 1/2 tsp (.13 oz) salt
* 1/2 tsp (.055 oz) instant yeast
* 1 Tb (.75 oz) agave syrup or sugar
* 1 Tb (.5 oz) vegetable oil
* 1/3 to 1/2 cup + 2 Tb (3 to 4 oz) water, at room temperature
* Poppy seeds, sesame seeds, paprika, cumin seeds, caraway seeds, or kosher salt for toppings
[Sesame for me!]

1.  In a mixing bowl, stir together the flour, salt yeast, agave, oil, and just enough water to bring everything together into a ball.  You may not need the full 1/2 cup + 2 Tb of water, but be prepared to use it all if needed.

2.   Sprinkle some flour on the counter and transfer the dough to the counter.  Knead for about 10 minutes, or until the ingredients are evenly distributed.  The dough should pass the windowpane test (see http://www.wikihow.com/Determine-if-Bre … ong-Enough for a discription of this) and register 77 degrees to 81 degrees Fahrenheit. The dough should be firmer than French bread dough, but not quite as firm as bagel dough (what I call medium-firm dough), satiny to the touch, not tacky, and supple enough to stretch when pulled.  Lightly oil a bowl and transfer the dough to the bowl, rolling it around to coat it with oil.  Cover the bowl with plastic wrap.

3. Ferment at room temperature for 90 minutes, or until the dough doubles in size. (You can also retard the dough overnight in the refrigerator immediately after kneading or mixing).

4.  Mist the counter lightly with spray oil and transfer the dough to the counter.  Press the dough into a square with your hand and dust the top of the dough lightly with flour.  Roll it out with a rolling pin into a paper thin sheet about 15 inches by 12 inches.  You may have to stop from time to time so that the gluten can relax.  At these times, lift the dough from the counter and wave it a little, and then lay it back down.  Cover it with a towel or plastic wrap while it relaxes.  When it is the desired thinness, let the dough relax for 5 minutes.  Line a sheet pan with baking parchment.  Carefully lift the sheet of dough and lay it on the parchment.  If it overlaps the edge of the pan, snip off the excess with scissors.

5. Preheat the oven to 350 degrees Fahrenheit with the oven rack on the middle shelf.  Mist the top of the dough with water and sprinkle a covering of seeds or spices on the dough (such as alternating rows of poppy seeds, sesame seeds, paprika, cumin seeds, caraway seeds, kosher or pretzel salt, etc.)  Be careful with spices and salt – a little goes a long way. If you want to precut the cracker, use a pizza cutter (rolling blade) and cut diamonds or rectangles in the dough.  You do not need to separate the pieces, as they will snap apart after baking.  If you want to make shards, bake the sheet of dough without cutting it first.

6.  Bake for 15 to 20 minutes, or until the crackers begin to brown evenly across the top (the time will depend on how thinly and evenly you rolled the dough). [After 11 minutes the thin areas were pretty brown.]

7.  When the crackers are baked, remove the pan from the oven and let them cool in the pan for about 10 minutes.  You can then snap them apart or snap off shards and serve.

Published in: on September 27, 2008 at 8:44 am  Comments (6)  

Complicated Chocolate Eclairs

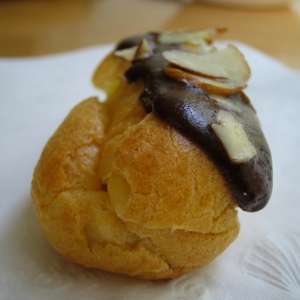
Eclair filled with almond pastry cream

Eclair filled with almond pastry cream

(Eeee, I’m posting a day late… That’s what I get for spending 12h in the library studying!)

It’s my first time as a Daring Baker and we’re taking on eclairs (click for challenge recipes) this month. I’m home for three days before I head back to NY and med school. I decided to tackle this challenge here at home because it’s the last time I’ll have time for a big baking project, mom has a bigger kitchen and it’s better stocked with equipment (including a more reliable oven). It’s also my brother’s birthday at the end of this visit, so I’m making a Genoise cake with buttercream frosting as well. It’s taken some careful planning to make it all happen. Since I’m not allowed to post until the end of the month, I’m going to try to write this up daily and post it all at the end.

I decided to keep the chocolate frosting for the eclairs but use Julia Child’s pastry cream filling with a little Italian Meringue folded in (since I had to make some anyway for the cake’s buttercream frosting). It was my brother’s suggestion, and my mom agreed I should try a classic eclair. I’m not the biggest fan of classic eclairs because of the custard filling (it’s a texture issue I have with custards and smooth puddings). Luckily Julia also offers an almond custard variation so I’m trying that one too. I really need to buy my own copy of “The Way to Cook.”

Here’s what’s on the schedule:

Wednesday: Creams, Glazes, Sauces, Meringues and a Brittle

Julia’s Italian meringues
to add to…Julia’s pastry cream
and for…Julia’s buttercream frosting
Chocolate sauce
to make…Chocolate glaze
Almond brittle
to pulverize into Praline… just for the hell of it.

Thursday: Baking Day

Two Genoise cakes
Choux (Cream Puff Dough)
Assemble Eclairs

Friday:

Assemble the birthday cake and play around with cake decorating

I compiled the ingredient list for everything and went to the store to buy:
17 eggs (2 dozen, really, since I’m bound to mess up)
1 lb of butter
12 oz of chocolate
1c heavy cream
2c whole milk
… and I don’t even want to know how much fat that adds up to.

Wednesday:

I started with the custard. This I whisked by hand because it was all on the stove. Mom has a hand held mixer, but it didn’t seem like it would be that much whipping. I didn’t count on how thick the yolks, sugar, and flour would be. I need to work on my whisking arm. The only thing I would recommend is a third hand for dribbling in the hot cream. I made a bit of a mess trying to whisk with one hand while pouring with the other. The batter was so thick at first that whisking tended to move the pan around instead of the batter.

The Italian meringue came next, and this is always a bit of a nightmare. It requires boiling sugar syrup to soft-ball stage. Mom has a candy thermometer, but its accuracy is questionable. Thankfully we hit the upper end of soft ball stage and the meringue was perfect.

Next I folding in some meringue into the pastry cream, which really altered it’s custard-like texture and flavor. Next time I might use less meringue… or maybe I’ll just try the chocolate pastry cream from the challenge. I’m also looking forward to trying it with the praline (aka, pulverized toasted almond brittle… which doesn’t really remind me of praline all that much).

The chocolate sauce and glaze came together very easily. The glaze might be a bit lumpy, but I’m not too worried. It’s in the fridge right now and I hope I don’t mess up the mixture when I heat it up to glaze the eclairs.

At the end of the afternoon of cooking my dad came home and was impressed with all I had made, but he did point out that I still hadn’t learn to clean up as I go. Tee hee.

Recipes:
I’m writing up the recipes from Julia Child’s “The Way to Cook.” She gives more detail than I do, and this book is seriously a huge help for some scary recipes. It even has step-by-step photos for some of the more complicated techniques. If you can’t buy it, or don’t own it, just swing by a bookstore and flip through some of the recipes for some great pointers.

Italian Meringue: From Julia Child’s “The Way to Cook”
2/3 c egg whites (4-5 egg whites)
pinch of salt
1/4 t cream of tartar
1 1/3c sugar
1/2c water

The eggs:
Beat the eggs slowly at first until they foam, and salt and cream of tartar and beat on medium-high until soft peaks form.

The sugar:
Meanwhile, you want to make the sugar syrup so it’s ready about the same time as the eggs. Heat the sugar and water until the sugar is completely dissolved, then boil until it thickens to soft ball stage. Check it with a candy thermometer or by dropping a bit into cold water and checking that it’s soft when cool.

Slowly pour the sugar syrup into the eggs while the mixer is running on medium. Continue beating until stiff white peaks form.

Pastry cream: From Julia Child’s “The Way to Cook”
Julia offers some variations. I’m writting up the recipe I made.
6 egg yolks
1/2c sugar
pinch of salt
1/2c flour
2c milk
1T vanilla
1T unsalted butter

Heat the milk. Whisk eggs, sugar and salt until lemon yellow in color. Whisk in flour. Slowly add the heated milk while whisking so the eggs don’t cook. Heat the whole mixture over medium until it boils. Whisk out any lumps that may form after it starts to boil, then you can switch to a spoon. Cook about 2 minutes to cook the flour. Pass through a sieve, then add the vanilla and butter. Allow to cool. Fold in one cup of the meringue. Technically this is called Creme Chiboust with the meringue in it, which lightens the custard and give it more hold.

Praline (pulverized toasted almond brittle): Scaled down from Julia Child’s “The Way to Cook”

1/2c blanched and slivered almonds, toasted in a pan on the stove
1/2c sugar
1/6c water

Boil the sugar and water until it starts to turn golden brown and caramel color. Leave it on the stove a few more seconds. Mix in the almonds and try to spread it out on an oiled baking sheet. Brittle is supposed to be thin, but if you’re pulverizing it anyway (I used a food processor), I doubt it really matters, as long as you can get it off the baking sheet. Julia suggests having a metal spoon and spatula on hand.

For the Chocolate Sauce and Glaze, I send you to the original recipe (link to come).

Thursday:

This day started with two genois cakes for my brother, and then the choux. The batter really did come together quite quickly. I pipped mini-size eclairs which were perfectly two-bite sizes. With the bit of choux left over, I made a few round eclair shells, too. I made two sheets of mini-eclair size, which each baked up very differently.

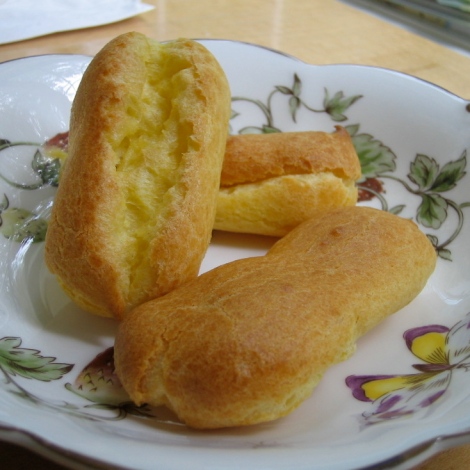
Choux pastry

The one on the left, with the crack down the middle, was baked on a heavy, thick pan, started on the lower shelf in the oven, and when turning pans and shifting shelves during baking, I set this pan down a little hard and it looked like it caused these choux shells to collapse a bit. They puffed up again beautifully in the last 8 minutes of cooking. The choux on the rest of that pan has beautiful cracks all over the place that really reminded me of eclairs.

The one on the right, with the very smooth top was baked on a thin pan, started on the upper shelf in the oven, and wasn’t jostled at all during the pan rotation. Every eclair on this pan had a similar smooth top with some cracks around the bottom where the choux touched the baking sheet. I ended up flipping these over to remove the bottom “pedestal” of the choux (which came away very cleanly) to coat with chocolate. You really can’t tell that these eclairs are upside down. In fact the few I didn’t flip kept tipping over with the heavy pastry cream.

I wish I knew a little more about how choux worked so I could figure out why this happened.

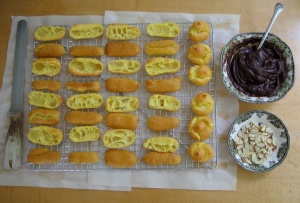
I took over the entire kitchen table to put these together.

Setup to glaze and fill choux

Setup to glaze and fill choux

The pastry cream kept very well in the fridge. The chocolate glaze was nearly solid when I took it out of the fridge, but a quick turn in the microwave on a very low power setting softened it right up. I folded the praline into some of the cream. Perhaps I folded in too much, or the damp day added some moisture to the praline, because the almond pastry cream lost a lot of it’s hold. Really, it was a runny mess… but a very tasty runny mess. The pastry cream on the other hand help up quite well in the choux. For the round choux, I just stick the tip of the pastry bag into the middle and filled up the puff with cream. I added some slivered almonds on top of the eclairs with the almond filling. I was having so much fun piping the custard I accidentally piped it into some intended for the almond pastry cream.

Filled and glazed choux

Filled and glazed choux

Photographing this was a lot of fun. I didn’t let anyone eat any of them until I had all my pictures… until the camera tipped over on it’s tripod and fell on two of the eclairs. Those were up for grabs. And thankfully none got on my lense!

Published in: on September 1, 2008 at 7:11 am  Comments (4)  
Tags: , ,